|
|
|
T-Shirt Picture Tutorial
This was not my original idea. I saw a graphic and made this tutorial to show members
of a graphics group how to make the graphic from scratch if wanted or just
can apply any graphic to a t-shirt graphic and apply a drop shadow or any effect
you desire. This tutorial was created using PSP 7.
~~~~~~~~~~~~~~~~~~~~~~~~~~~~~~~~~~~~~~~~~~~~~
Feel free to share this tutorial, but you must keep the Storme Designs
link with it. If you have questions, just send E-Mail.
~~~~~~~~~~~~~~~~~~~~~~~~~~~~~~~~~~~~~~~~~~~~~
Creating the T-Shirt - Part 1
If you just want instruction on placing a graphic on a shirt, skip to Part 2.
~~~~~~~~~~~~~~~~~~~~~~~~~~~~~~~~~~~~~~~~~~~~~
The size of your t-shirt is up to you. I always like to work on a large surface.
Open up a new graphic 550 by 550 or larger, transparent, 72,000 resolution and
16.7 million colors.
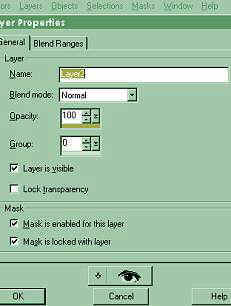
Next, I always work on layers. If you make a mistake can just delete the layer,
as you go. Go to Layers, new raster layer, and accept what opens in the window.
click okay. You can name your layers as you go for easier identification.
You would name this layer, Body.
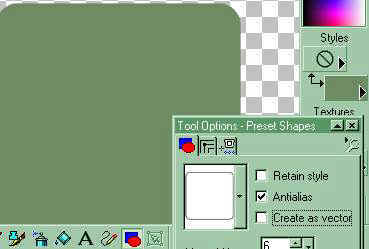
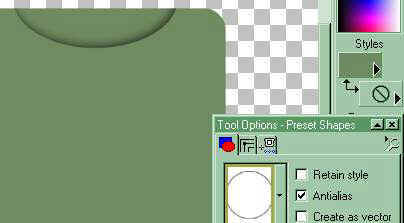
Click on your preshape tool. Set your style to nil, as shown below. Choose
the color you would like your shirt to be for your background color. Select
your rounded rectangle preset shape set to about 6 width and antialias checked.
Make a large rectangle, which will be the body of your t-shirt.
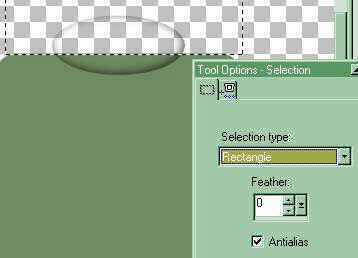
Next, click on your Selections tool and set it to ellipse. Draw an ellipse in the center
of your t-shirt on the top. It can go over the top also, as you can see in the
2nd image below. This is to make the neck opening and give depth to the shirt -
creating the back.
For the depth go to Effects, 3D Effects, Cut-out and use these settings.
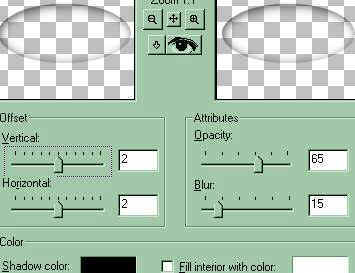
vertical and horizontal at 2, opacity at 65 and blur set to 15
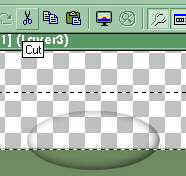
and click okay. To remove the extra top part click on your selections tool set to
rectangle and line it up to the beginning of your shirt and above.
Then click on Edit, cut or the scissors on your toolbar.
This will remove the extra part over the top.
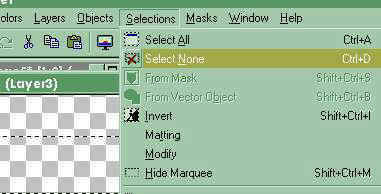
Now go to Selections and click on select none.
Now we have our opening. We can leave it like that or if you like make a tubed
collar look. Click on a new layer. You can name this layer collar. Change your textures
in the palette to nil this time and have your foreground set to your t-shirt
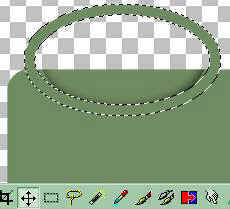
color. Click on the pre-shapes tool again and set it to ellipse with
antialias checked and width about 11. Now draw the ellipse around the previous
neck ellipse, as show below. If it doesn't line up exactly, it's on it's own
layer and you can move it to align it after you bevel it. Go to Effects, 3D Effects,
Inner Bevel and use the settings below.
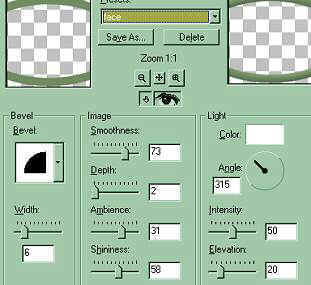
the right round shape, width 5, smoothness 73, depth 2, ambience 31, shininess 58,
color-white, angle 315, intensity 50 and elevation 20. You can always play with
and choose your own look.
If you want a back collar, copy this one and paste as a new image.
Now if you need to line it up use your mover
tool. The square one highlighted in the graphic below and move
your collar to line up below the depth shadow after deselecting it.
Now as above click on your selection tool set to rectangle. Make
a rectangle covering the part that went above your t-shirt top, and
go to edit and cut.

I am far from an artist, so you can follow my trials or play on your own, lol.
For the back collar, Go to the image you copied and using the selection tool
set to rectangle, select the bottom section and copy it. Then paste as a new
layer on your t-shirt and using your mover tool line it up to your liking.
You can use the smudge tool, white hand, if you want a more even look and smudge
the top and bottom collar together.
Click on a new layer. There are two ways you can add sleeves. The first time
I used my paintbrush tool. Set to about size 5, rest set to 100, with the round shape and just drew
an outline. Using the magic wand select the inside of the sleeve and go to selections,
modify, expand to 2 and click okay. Click on the flood-fill tool and fill it with your
t-shirt color.
The second time I tried using the preshape tool set to rectangle, and
drew a rectangle with my t-shirt color. Styles would be set to nil and the
background color would be set to your t-shirt color. Next I went to image, rotate
and clicked on left direction and the free box set to 15. Then I moved it to where
it fit well with the t-shirt. Go to edit, copy. Then paste the sleeve as a new
layer. Then go to Image, Mirror and move the sleeve to where it lines up
well on the other side of your t-shirt.
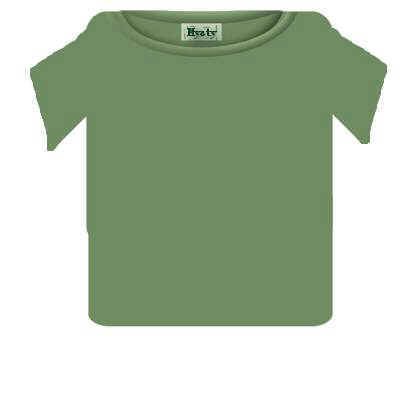
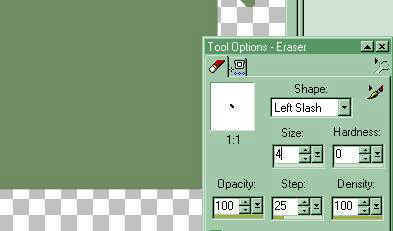
Now, again, you can leave your shirt as that or give it a worn look.
Using your eraser tool, which you can set as below or to your own settings.
Erase the bottom giving some curve to your shirt.
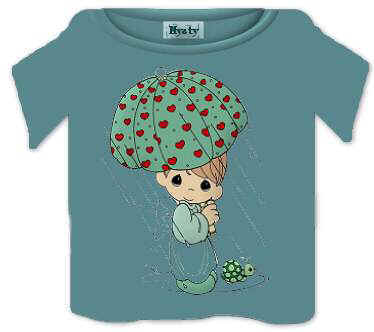
The finished waviness is below. You can add a label by making a small square below your
back collar and adding your name or stitches.
~~~~~~~~~~~~~~~~~~~~~~~~~~~~~~~~~~~~~~~~~~~~~
Placing A Graphic on a Shirt - Part 2
To add a graphic. Select any graphic you like.
Copy the graphic and paste it as a new layer. The below one was a picture
and I smudged the edges to fade it into the t-shirt.
You can leave the graphic as is, use a drop shadow, bevel, emboss etc.
The one below was made using the preshape tool for the sleeves.
~~~~~~~~~~~~~~~~~~~~~~~~~~~~~~~~
This was created with PSP 7 ~ download a trial version.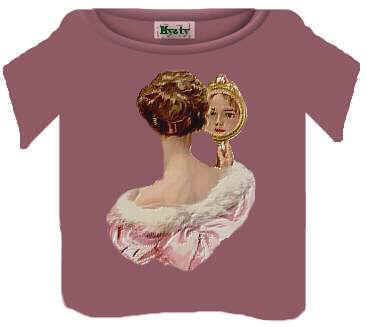
If you use any of our graphics, please provide a link back to
![]()
Our New Site Index is at Storme Millennium Index.
~~~~~~~~~~~~~~~~~~~~~~~~~~~~~~~~
Check our main Tutorial page for new listings at Storme Millennium Tutorials.
[Links][Care][Help][Parlor][Storme Central] [Millennium] [Storme II][Den]
[Yard][cards and services][Garden][MadCat][Patriotic Porch][Study] [Patch] [Attic]
[Ring] [Vacation] [Furship] [Add link][Designs] [Adoptions] [Halloween][Birthday]
[Loft] [Snow] [Game][Island] [Hostess] [Banners] [Graphics] [Lists]
[AdotptionPorch][Award] [Library] [Shelf][Tutorials][Loft2][Cat]
Our page was edited on January 6, 2004.
T-Shirts are donned through 50 Megs.