|
|
|
|
Expanding Canvas Size Tutorial
I've been working with Paint Shop Pro awhile now and am still learning more every day. I'm far from an expert. Simple steps that someone else may take as easy and learned early on, may take another awhile to learn depending on the source for their paint shop learning. I taught myself and then learn more each time I take a tutorial or visit a Paint Shop Information site. ~~~~~~~~~~~~~~~~~~~~~~~~~~~~~~~~~~~~~~~~~~~~~ This tutorial is simply to show you how to increase your canvas size, when creating a new image. When I first started out, I was afraid to play around for fear I'd lose my work, which still happens often to us all if we don't save often as we create our graphics. ~~~~~~~~~~~~~~~~~~~~~~~~~~~~~~~~~~~~~~~~~~ First you open your graphic in paint shop. If you are following a tutorial or something similar, it usually gives you a size. Many times you may have drawn a shape larger than the tutorial was prepared for or you began working on a graphic and have no more room on your original graphic to finish your creation.
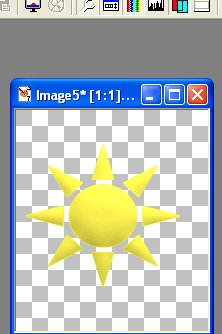
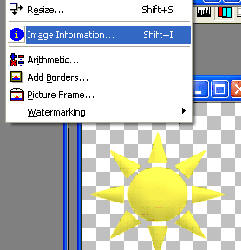
Above is the image I'm creating, a sun with the shapes tool. Now, I've decided to add a star to the left of the sun, but not much room. ~~~~~~~~~~~~~~~~~~~~~~~~~~~~~~~~~~~~~~~~~~ First, you go to Image and then click on Image information,
this is to check the size of your image. You want to make your canvas area larger than the existing size.
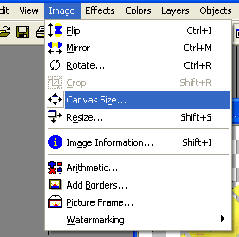
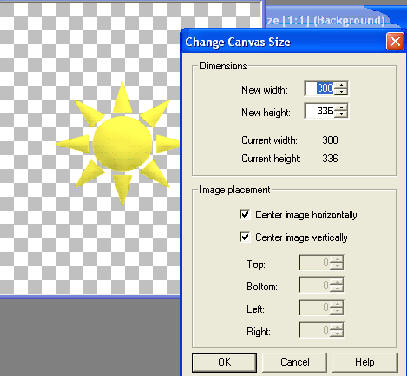
So, I want my width to add a star to be larger than 222 pixels. So I will increase mine to 300 and see how it looks. You then Click on Image, then Canvas size.
After the Canvas size window opens, you can increase the size of the image you are working with.
Above I increased mine to 300 and you can see the increased size on the left. When the canvas window opens, you change your width or height., as you need. Below you will see window placement. I have center horizontally and vertically checked. You can choose to size the top, bottom, left or right instead and uncheck those selections. Finish your work and you're done!
Hope this helps someone!
If you use any of our graphics, please provide a link back to http://mystyqcat.50megs.com/tute/tshirt.htm or our home page, thank you.
Check our main Tutorial page for new Tutorial listings at ~~~~~~~~~~~~~~~~~~~~~~~~~~~~~~~~ Our New Site Index is at Storme Millennium Index. ~~~~~~~~~~~~~~~~~~~~~~~~~~~~~~~~ This was created with PSP 7 ~ download a trial version.~~~~~~~~~~~~~~~~~~~~~~~~~~~~~~~~ This Tutorial was created for the Garden of Friendship HTML Committee.
[Links] [Care][Help][Parlor][Storme Central] [Millennium] [Storme II][Den][Yard][cards and services][Garden][MadCat][Patriotic Porch][Study] [Patch] [Attic] [Ring] [Vacation] [Furship] [Add link] [Designs] [Adoptions] [Halloween][Birthday] [Loft] [Snow] [Game][Island] [Hostess] [Stratford][Banners] [Graphics] [Lists][Award] [Library] [Shelf] [Welfare][Cat] [AdotptionPorch][Tutorials] [Loft2][Island2][GraphicII][Postcards][Fireworks][Index]
|
This canvas was edited on January 10, 2004.
Our canvas is online at 50 Megs.