|
Pictorial
Room Divider Tutorial
by Storme
Designs

Above is the screen you will be making. This is not my
original idea.
Saw a chinese screen and made one at a site. Saw another
graphic made
with a scene, but don't know who created it. So, decided
to create them
by placing a whole scene in a screen from a large picture.
Each slat
of the divider or screen has part of the whole scene.
Another sample is at the end of this page.
~~~~~~~~~~~~~~~~~~~~~~~~~~~~~~~~
This was
created with PSP 7 ~ download
a trial version.
~~~~~~~~~~~~~~~~~~~~~~~~~~~~~~~~
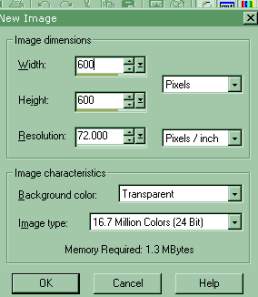
First you want to make the basic slats for the screen.
Open a new
graphic. The size is up to you to choose depending on how big
you
would like your screen. I always like to work on a large
surface. My
new image was 600 by 600.
Open your shapes tool and set it to rectangle. Check
Antialias only.
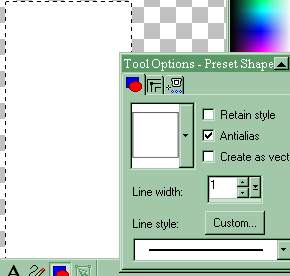
Select a color for your slat. If you wish to place it in
blade pro for a gold
edge, as I did on my screens, or use the effects sculpture you
should
choose a light color. Draw a rectangle to the size you
prefer your
screen to be. Now click on your magic wand, then
click in the middle of
your rectangle to select it.
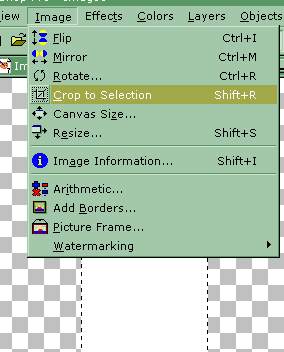
Now click on Image then Crop to Selection
You are going to add a border. If you used white or a
light color
make sure you change it slightly for the next step - adding a
border.
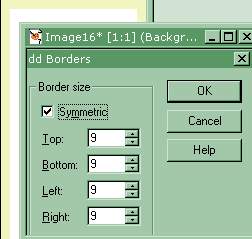
Now click on Image then Add Borders
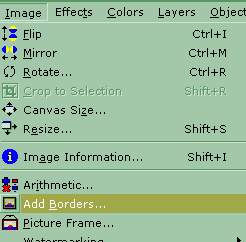
Next, you will add a border of about 7 or what you prefer.
Select your border with your magic wand or go to
select all, then
select float. Now you can use PSP's inner bevel, Sculpture
effect
or any Plug in or filter to make the border you prefer. I
used a
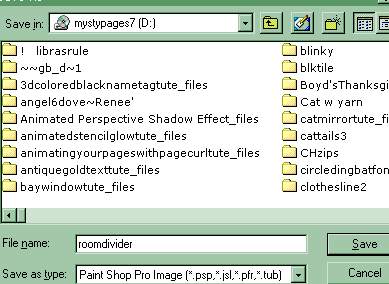
Blade Pro gold preset. Once the slat with the border is to
your
liking save it as a psp tube.
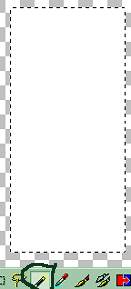
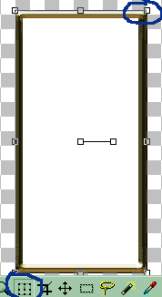
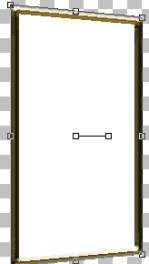
Once you draw your slat, you will see a line around it
and about 8 small squares around it and in the middle, as below.
~~~~~~~~~~~~~~~~~~~~~~~~~~~~~~~~~
Now, we are going to paste the slat as a new layer on a new
graphic.
I made my new graphic 600 by 600 again. Click on the
deformation
tool circled at the bottom of the graphic below.
A thin line is now around your graphic and small squares.
Hold down your control key, Ctrl on your keyboard, and place
your
mouse over the top right corner small square. When you are
over it
the shape of the deformation tool will change from the square
with the
arrow. Looks sort of like two arrows crossing and a box on
top. Now,
left click on your mouse on the corner square, while holding the
control
key and move your mouse down a little. Both the top and
bottom of
the right side of the slat with move inward. You can slant a
little or more
as you like.
Now you have a basic
slanted slat and can copy and paste it for four slats for your
screen
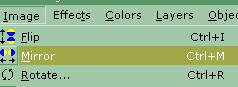
or as many or few slats as you desire. Go to Image, then
Mirror
for two of the slats. Then place the mirrored ones next to
a
graphic you did not mirror.
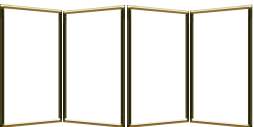
the 4 slats copied and mirrored.
~~~~~~~~~~~~~~~~~~~~~~~~~~~~~~~~~
Remember to save your work often just in case you computer
freezes or you have to leave your work etc.
I put each slat on a new layer, while working in case I needed
to
change or redo anything.
~~~~~~~~~~~~~~~~~~~~~~~~~~~~~~~~~~~~
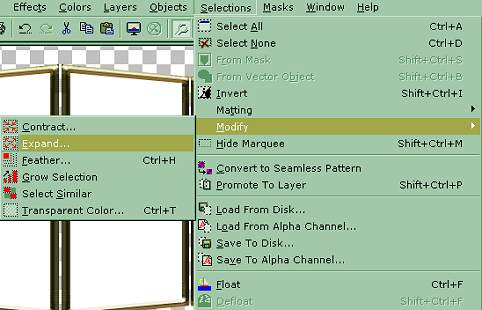
For the picture I clicked on each slat individually with my
magic wand
to select the slat or you can go to select all, then float.
You will
then need to click on modify, then expand and expand your image
by 1 or 2 pixels.
If you do not want to use a picture, you can just flood
fill your slats and apply tubes.
~~~~~~~~~~~~~~~~~~~~~~~~~~~~~~~~~~~~~~~
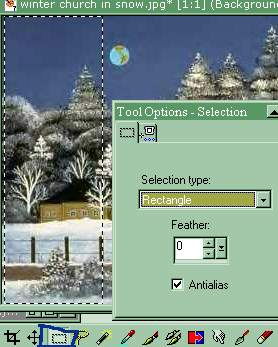
Now open a picture you want to put in your screen. What
you are
going to do is divide it in to four parts. It doesn't have
to be perfectly
done, but look at it and determine if you can fit it adequately
into your
divider. Click on your selection tool set to rectangle and
using your
judgment make a one quarter on the left side of your picture
selection.
Copy and paste that into your selected slat.
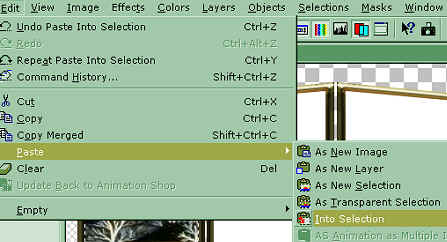
You select the next quarter of your picture and copy and
paste it into the next slat, then the next two quarters of your
picture
into the next two slats. You can overlap some of the
picture
depending on what picture you are using.
You can apply a bevel or shadow, if you like. For the
screen below
I applied a drop shadow at 0 horizontal, blur and vertical
settings with full
opacity.
~~~~~~~~~~~~~~~~~~~~~~~~~~~~~~~~~~~
Making the connecting joints is up to you also, I just
created
a small rectangle with my shapes tool and then used blade pro
for the small gold joints in my screens. Then put the
joint layers
under the screen layers.
You're done! You can apply tubes, if you like, as you can
see on mine.
My other screen.

If you use any of our graphics, please provide a link back to
http://mystyqcat.50megs.com/fish/roomdivide.html

The house in the picture was created from a tutorial at
Queen Anne Victorian
House Tutorial , Thank you.
~~~~~~~~~~~~~~~~~~~~~~
The dolphin on the screen at the top of the page was
from at tutorial at Cathy's Corner.
Check our main Tutorial page for new Tutorial
listings at
Storme
Millennium Tutorials.
~~~~~~~~~~~~~~~~~~~~~~
[Help][Parlor][Storme
Central]
[Millennium]
[Storme
II][Den][Yard][Shelf] [Garden][MadCat]
[Patriotic Porch][Study]
[Patch]
[Attic]
[Ring]
[Vacation]
[Furship]
[Designs]
[Adoptions]
[Halloween][Birthday]
[Loft]
[Snow]
[Island]
[Hostess]
[AdotptionPorch][cards
and services]
[Banners]
[Ring][Graphics]
[Lists][Award]
[Links][Garden
Friends]
[Haunted Courthouse]
[Library[RealEstate]][Gof Birthday][Tutorials][Fireworks][Cat][Island2][GOF
angels]
[GOF
gallery][Island2][Care][Welfare][Quilt][Index][Add
link][Loft2]
|